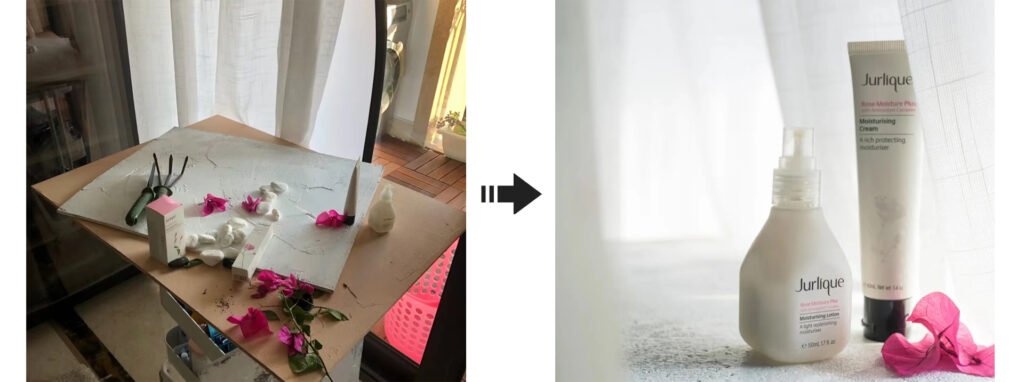
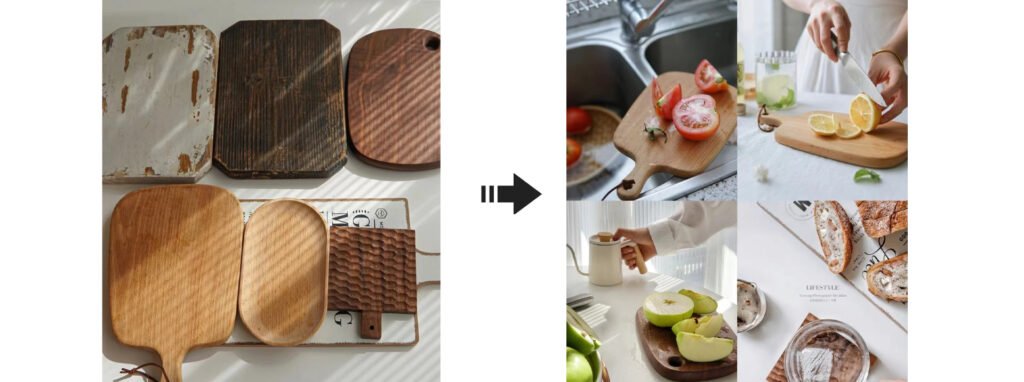
Do you need to take some photos for your blog or website but don’t have the budget to hire a professional photographer? Or maybe you’re just starting out and don’t want to invest in photography equipment yet. No problem! In this blog post, we will teach you how to take DIY photos with white background at home using everyday items that you probably have lying around. With just a few simple tips and tricks, you can create high-quality images that will make your website look professional!
Tips for Taking the Best DIY Photos with White Background At Home
Choose The Right Space In Your House
The first step to taking great DIY photos with a white background is finding the right space in your house. Look for a room that has plenty of natural light and a clean, clutter-free surface. Avoid using flash photography, as this can often create unwelcome shadows on your subject. If you don’t have a lot of natural light to work with, you can try using lamps or other artificial light sources to brighten up the space.
Set Up Your Camera And Tripod
Once you’ve found the perfect spot, it’s time to set up your camera. If you’re using a DSLR camera, we recommend using a tripod to keep your shots steady and avoid camera shake. If you don’t have a tripod, you can try leaning your camera against a wall or something else sturdy.

If you’re using a point-and-shoot camera, you may not need a tripod—make sure you have a steady surface to set your camera on.
Once your camera is in place, take a look through the viewfinder or LCD screen and frame your shot. If you’re using a DSLR, you may want to use live view mode to get a better idea of what your final photo will look like.
Once you’re happy with the framing, it’s time to focus your camera. In most cases, you’ll want to use autofocus, but you may need to switch to manual focus if your camera has trouble locking onto the right area.
To focus your camera, point it at something with high contrast—like a black rock in a sea of white snow. Once the camera finds the right spot, half-press the shutter button to lock in the focus.
Hang A White Sheet Or Curtain Behind Your Subject
This will create a natural white backdrop for your subject, which is especially helpful if you’re shooting outside on a sunny day. Hang the sheet or curtain high enough so that it’s well above your subject’s head, and make sure there’s plenty of space between the fabric and your subject so that the light doesn’t reflect off the fabric and into your lens.
If you don’t have a white sheet or curtain, you can also use a piece of white foam core board as a makeshift backdrop. Just tape it to a wall or door frame behind your subject.

Use Small Pieces of White Board For Product Photography
If you’re photographing small products, you can use small pieces of white foam core board to bounce light onto your subject. Just tape the boards to the wall or door frame on either side of your product, and position them so that they’re reflecting light onto your subject from different angles. It’s an easy way to create professional-looking product photos without an expensive lighting setup.
Use a White Reflector to Fill in Shadows
If you’re shooting in a situation where there’s harsh light and shadows, you can use a white reflector to fill in the shadows and create a more even light. Just hold the reflector under your subject’s chin, and angle it to reflect light back up into their face.
Use Your Room’s White Wall As A Background
If you don’t have a white sheet or curtain, you can use your room’s white walls as a background. Just set up your subject in front of the wall, and make sure the lighting is coming from the side or behind so that it doesn’t create any shadows on the wall. You can also use a reflector to fill in any shadows on your subject’s face.
Use A White Curtain To Make A Light Box For High Quality Product Photography At Home
If you want to take high quality product photos at home, you can use a white curtain to make a light box. Just set up your product in front of the curtain, and position a few lamps around it so that they’re pointing into the curtain. The light will bounce off the curtain and create a soft, diffused light that’s perfect for product photography.
Use White Plates for Food Photography
If you want to take professional-looking food photos at home, using white plates can really help give your shots a clean and polished look. By placing your food on a white surface, you’ll be able to get a nice even exposure and avoid any areas of darkness or shadow. Plus, it can be really helpful in post-processing to have a nice white background to work with.
If you don’t have any white plates, you can also use a white sheet of paper or even a white tablecloth. Just make sure that whatever you use is clean and free of wrinkles. Once you have your white surface ready, set up your food on it, and then get started with taking your photos.
Shoot In Natural Light Whenever Possible
This is great advice for anyone taking photos, not just those with a DSLR. Natural light can make such a difference in the quality of your photos, and it’s free! If you can, shoot outdoors in the early morning or late afternoon when the light is softer and more flattering. If you’re stuck indoors, try to find a room with lots of windows and shoot near them. Your lawn can be a great place to shoot too! Make sure you have all the accessories to make a white background on your lawn.
You can use a white curtain or white bed sheets, or any other white fabric large enough for your desired photography results. You will also need a frame where you can hang the white sheets. You can use different items at your house to create a supporting frame for the white background.
(Click for Product Shooting Lighting Arrangement Guide)
Use Household Items As Props To Add Interest to Your Photos
One way to add interest to your photos is to use household items as props. This can be anything from a vase of flowers to a piece of fruit. The key is to choose items that will contrast with the background and make the photo more visually appealing. Be sure to experiment with different angles and compositions to get the most impact from your props. Let your imagination and creativity run wild; once you start looking at each thing in your house in a more creative manner.

You will realize that everything can be used as a prop. However, it is important to keep the color shades in mind as well, especially when you are planning on using a white background. So avoid using white products as props as they might not do your photography any good.
Experiment with Different Angles and Compositions
If you really want to get creative, experiment with different angles and compositions. For example, instead of taking a traditional head-on photo, try getting a little closer and shooting from above. Or, for a more unique perspective, try lying on the ground and photographing your subject from below.
These are just a few ideas to get you started – the possibilities are endless! This can be really easy when you are working in a studio; however, when you are at home and you are taking DIY photos with white background, things can get a little tricky. You would have to use white sheets available at your home to create a white backdrop. However, in order to take the pictures from different angles and compositions, you will need to have a white background that is either moveable, or there should be a place where you can hang your DIY background on all sides of the room.
The best way would be to take a few white curtains and bed sheets and create a relatively large tent-like lighting box. So you will be covered with white from all sides. You can easily experiment with different angles when you are inside the tent because no matter where you focus your camera, there will be white background.
(Click for What Are The Best Angles To Choose For Product Photography?)

Set Your Camera to the Highest Resolution Possible
This will give you the best possible image quality when printing your photos. If you’re not planning on printing your photos, then you can save some storage space by setting your camera to a lower resolution. But if you do plan on printing them, make sure to set your camera to its highest resolution so that you don’t lose any detail in print. Make sure to get a high quality camera if you plan on printing your photos, as well! The quality of the camera will have a huge impact on the results of your photographs.
Use A Reflector
A reflector is a great way to get started with writing content. By using a reflector, you can easily see what others have written about your topic and then build on that information. Additionally, a reflector can help you organize your thoughts and ideas so that they are easier to write about. Finally, a reflector can provide you with feedback so that you can improve your content.
Edit Your Photos in Post-Processing
Once you’ve taken your photos, it’s time to edit them in post-processing. This is where you can really make your photos pop and look their best.
There are a few things you’ll want to do when editing your photos. First, adjust the white balance. This will ensure that your colors are accurate and that your photo looks its best.
Next, adjust the exposure. This will help to make sure that your photo is properly exposed and that all the details are visible. Saturation and color contrast are also something that you should focus on. It’s important to make sure that your photo looks natural, so don’t go overboard with these two things.
In addition to that, you should also sharpen your photo. This will help to make the details in your photo stand out and give it a more polished look.
Add some finishing touches. This could include adding a vignette or increasing the contrast. These final touches will really make your photo stand out and look its best. It’s important to make sure that you don’t overdo it, though. Too much of either one of these can really ruin a photo.
Experiment and have fun with it. Post-processing is a great way to really bring out the best in your photos. So, take some time to play around with the different settings and see what looks best. You might be surprised at the results you can achieve.
Post-processing can really help to improve your photos and make them look their best. So, make sure you understand the importance of this step and take the time to do it right.
Final Words
DIY photography can be a lot of fun. It is easier than most people think. All you have to do is let your creative juices flow, and you will be able to incorporate all items in the house in your DIY photography. You can also use white bed sheets, curtains, and wall paints as the background for your photography.
Taking great photos is a process that takes time and practice. But by following these tips, you can definitely improve your photography skills and take better photos. So, go out there and start shooting! By taking the time to learn about photography and understand the basics, you’ll be well on your way to taking amazing photos. Just remember to have fun with it and experiment. That’s the best way to learn and improve your skills.

