There is a lot of thought that goes into taking a great product photo. Lighting is one of the most important aspects of the shot, and it can make or break your photo. In this guide, we will discuss different lighting arrangements that you can use to take beautiful product photos. By following these tips, you will be able to create stunning images that will help sell your products!
Get High-Quality Equipment, Including High-Quality Lighting Options and HD Cameras
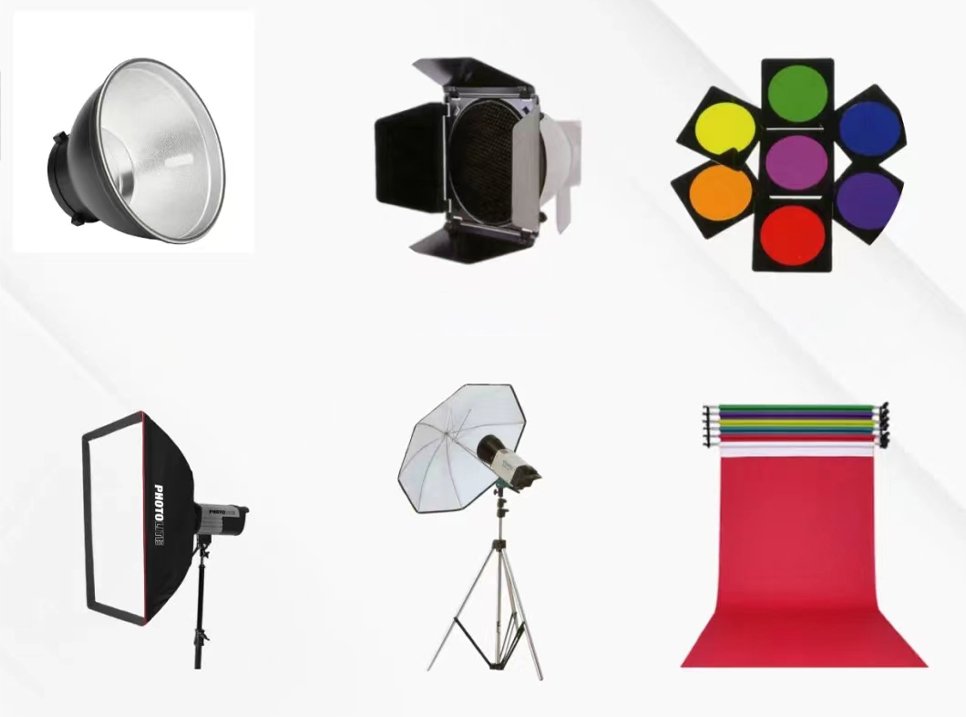
The first and most important thing you’ll need for product photography is high-quality equipment. This includes a high-quality camera, preferably an HD DSLR camera, and a selection of high-quality lighting options. You’ll also need a tripod to keep your shots stable and a light meter to help you get the perfect exposure. Know how many tripods and lights you need for your product photo shoot. And it is also important to know what type of lights you need for the respective photography session.
Use Off-Camera Lights to Shoot Product Photos
If you’re shooting product photos, you’ll likely want to use off-camera lights to get the best results. Here’s a guide to setting up your lighting so you can take great product photos.
When shooting product photos, it’s important to get the lighting right. If you have too much light, the product will be overexposed, and details will be lost. If you have too little light, the product will be underexposed, and it will be difficult to see details. The best way to get great lighting for product photos is to use off-camera lights.
Off-camera lights allow you to control the amount of light that hits the product, and they also allow you to position the light to get the best possible results. Here’s a guide to setting up your off-camera lights for product photography:
1. Start with one light. Next, position the light so it’s pointing at the product from about 45 degrees. If you’re using a flash, set it to 1/4 power. If you’re using a constant light source, position it, so it’s about 3 feet from the product.
2. Add a second light. Position this light, so it’s pointing at the product from the opposite side. This will help fill in any shadows that the first light creates. If you’re using a flash, set it to 1/2 power. If you’re using a constant light source, position it, so it’s about 2 feet from the product.
3. Add the third light. Position this light, so it’s pointing at the product from behind. This will help create a halo effect around the product.
Light Modifiers Are Very Important

No matter what type of product you’re shooting, light modifiers are going to be your best friend. They can help you shape the light to better highlight your subject, and they can also help you control the overall exposure of your image. In addition, light modifiers can help disperse the light evenly and in an optimal fashion. There are a variety of different light modifiers available on the market, so it’s important to choose the ones that will work best for your particular shoot.
Separate the Background From The Subject By Making The Backlight Brighter
If you want to make the background of your product photos look brighter, you can use a backlight to separate the subject from the background. This is especially effective when shooting with a white or light-colored backdrop. Position your product in front of the light source and make sure the backlight is much brighter than the foreground.
Place Lights Strategically
You’ll want to place your lights so that they create interesting shadows and highlights on your product. This will add depth and dimension to your photos, making them more visually appealing. You can experiment with different lighting setups to see what works best for your particular product.
One general rule of thumb is to place your lights at 45-degree angles from your product. This will create a pleasing, natural-looking light pattern on your subject. You can also play around with the distance of your lights from the product to get different effects. For example, closer lights will create more dramatic shadows, while further away lights will create more subtle shadows.
Of course, you’ll also want to make sure that your product is well-lit overall. You don’t want any dark areas in your photo, as this will make your product look unappealing. Instead, try to place your lights so that they evenly illuminate your subject.
Use More Than One Type of Light in a Single Shot
If you really want your product photos to stand out, try using more than one type of light in a single shot. This can create some interesting effects that will add dimension and depth to your photos.

For example, you could use a backlight to create a halo effect around your product. Or you could use a side light to create dramatic shadows. Experiment with different lighting setups to see what works best for your particular product.
Experiment with Different Lighting Options
One of the best ways to find the perfect lighting for your product shots is to experiment with different lighting options. Try out a few different setups and see what works best for your particular product and shooting situation. For example, you may want to use a diffuser to soften the light or a reflector to bounce the light back onto your subject.
Continuous Lighting:
As the name suggests, continuous lighting is a type of lighting that remains on constantly. This makes it ideal for taking photos of products in motion or for those who want to avoid the hassle of setting up and taking down their lighting equipment each time they want to take a photo.
Lighting From Above:
One of the most popular ways to light product shots is from above. This type of lighting creates a nice, even light that illuminates your subject without creating any harsh shadows. You can achieve this type of lighting by using a desk lamp, floor lamp, or even a ceiling light. Just be sure to position the light to shine directly down onto your subject.
Side Lighting:
Another popular lighting option for product shots is side lighting. This type of lighting can create some nice shadows and depth in your shots. To achieve side lighting, position your light source to the side of your subject. You may need to experiment with the positioning of the light to get the desired effect.
Natural Lighting:
If you’re shooting outdoors, you can take advantage of natural lighting. This type of lighting is often very soft and flattering. To get the best results, shoot during the early morning or late evening hours when the sun is low in the sky. You may also consider using a reflector to bounce the light back onto your subject.
Flash Lighting:
Another option for lighting your product shots is to use flash. However, this type of lighting can be very harsh, so you’ll need to be careful with the positioning of the flash. If possible, try to position the flash off to the side of your subject. You may also want to experiment with a diffuser to soften the light.
Ambient Lights:
In addition to the main light source, you may also want to use some ambient lights. These lights can help to create a more three-dimensional look in your shots. You can use various light sources for ambient lighting, including desk lamps, floor lamps, and even candles. Just be sure to position the lights so that they are not shining directly onto your subject.
No matter what type of lighting you use, be sure to experiment until you find a setup that works best for your particular product and shooting situation.
Place Reflectors According to the Lighting Arrangement to Bounce Light Back Onto Your Subject
Positioning a reflector is key to getting the perfect product shot. The reflector will bounce light back onto your subject, which will help to illuminate it. There are a few things to keep in mind when positioning a reflector:
- You’ll need to decide what type of reflector you want to use. There are many different reflectors on the market, so you’ll need to choose one that suits your needs.
- You’ll need to position the reflector to point toward your light source. This will ensure that the light is bounced back onto your subject.
- You’ll need to experiment with the positioning of the reflector to find the perfect spot.
Keep The Size Of The Light In Mind As Well
The size of the light is important to product photography for several reasons. First, the bigger the light, the more surface area it has to emit light. This means that you can get away with using a smaller light source if you have a large one. Second, the bigger the light, the more diffused the light will be. This is important because you don’t want your light source to be too focused, as it will create hard shadows. Finally, the bigger the light, the more distance it can cover. This is useful if you’re shooting a large product or trying to light a large area.
Remember that when you’re choosing a light source, you need to take into account both the size of the light and the power of the light. For example, a small light might not be very bright, but it can still be useful if you’re trying to create a soft, diffused look. Conversely, a large light might be very bright, but it might not be able to cover a large area. So choose your light source based on the size of your product and the look you’re going for.
Position Lighting Angles Very Carefully
Product photography is all about capturing the product in the best possible light. This means that you need to be very careful about the positioning of your lights. The angle of the light will have a big impact on how the product looks in the photo.
Some general tips for positioning your lights:
Make sure the light is not too harsh. Harsh light will create shadows that can make the product look less appealing.
The light should be positioned so that it highlights the features of the product. You want the viewer to see all the details of the product.
Try to create natural-looking light. This means avoiding direct sunlight or using a flash. Instead, use diffused light from a window or an artificial light source.
Get Moveable Lights:
One of the best things you can do for your product photography is to get moveable lights. This will allow you to position the lights exactly where you need them. You can also experiment with different lighting setups to see what works best for your product. You can find many types of moveable lights that will let you put maximum focus on your product’s unique features.
Common Problems with Shooting Light Arrangements and How to Fix Them
One of the most important aspects of product photography is getting the lighting right. The quality of light can make or break a photo, and poor lighting is one of the most common problems photographers face. In this guide, we’ll discuss some of the most common lighting problems and how to fix them.
1. Too Much Light
When there is too much light, photos can appear washed out or overexposed. This is often caused by too many lights or too bright lights. To fix this problem, try turning down the power of your lights or using fewer lights. If you’re using artificial lights, you can also try diffusing them with a sheet of tracing paper or a similar material.
2. Not Enough Light
If your photos are coming out dark or underexposed, there isn’t enough light reaching your subject. This can be caused by using too few lights or using too weak lights. To fix this problem, try using more lights or brighter lights.
3. Inconsistent Light
If the lighting in your photos looks uneven or patchy, the light is not reaching your subject evenly. This can be caused by using lights of different strengths or by using not properly diffused lights. To fix this problem, try to use lights of the same strength and make sure they are evenly diffused.
4. Shadows
Shadows can ruin a photo by making it look dark and dreary. This is usually caused by using too few lights or using lights that are not strong enough. To fix this problem, try using more lights or brighter lights.
5. Hot Spots
Hot spots are brighter areas of a photo than the surrounding area. This is usually caused by using too many lights or using too bright lights.
Final Words
Product photography is all about capturing the product in the best possible light. This means that you need to be very careful about the positioning of your lights. The size, positioning, and angle of the light will impact how the product looks in the photo.

