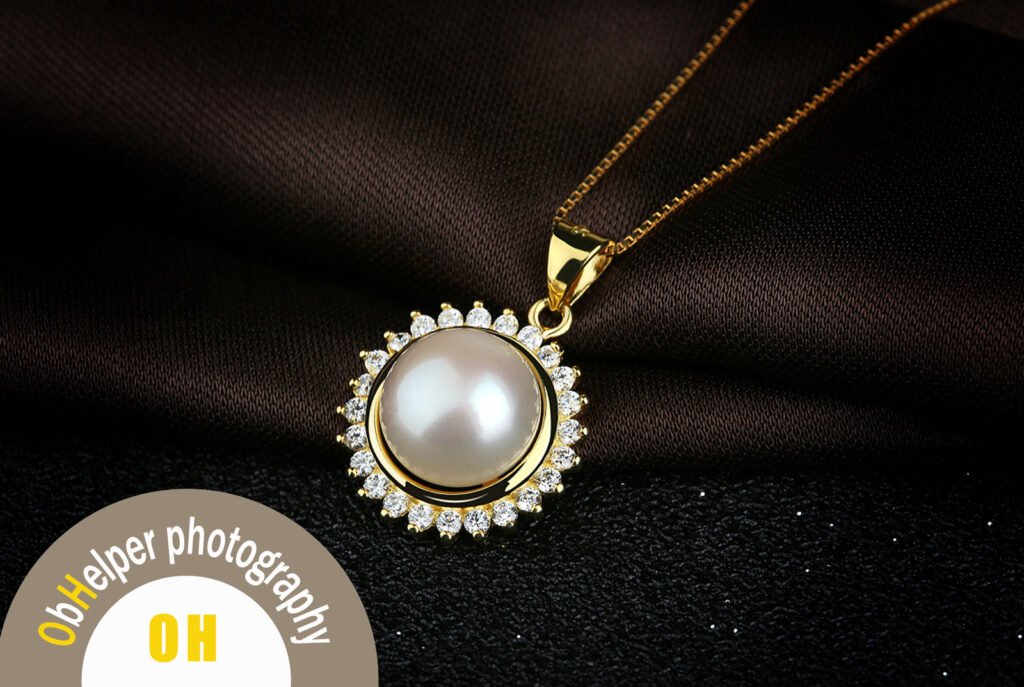
Product photography is not only a skill but art that not everyone can excel quickly. The most challenging product for photography is jewelry; you need to understand a lot. Many factors come into play here.
Due to advanced technology and high photography fees, hiring a professional for product photography can be difficult. But don’t worry, you can do it yourself once you understand how to do it perfectly. Here are some of the main factors that you have to keep in mind:
- Lighting
- Background
- Equipment
- And much more
However, just knowing the factors won’t do it. There is a lot more to understand to photograph jewelry perfectly. This guide will help with some of the best jewelry photography tips.
Tips or Factors For Before Photography
It doesn’t directly start with the part where you carry out the photography of your jewelry. Many things must be set in place to ensure nothing goes wrong. Jewelry is such a sensitive product that you would want to show it as beautiful as it is in the photographs.
Therefore, make sure the items mentioned below are arranged before the photography.
1. Lighting
Lighting is one of the most important factors that can affect your photography. The entire preparation will be wasted if the light is not set properly or chooses the wrong color tone.
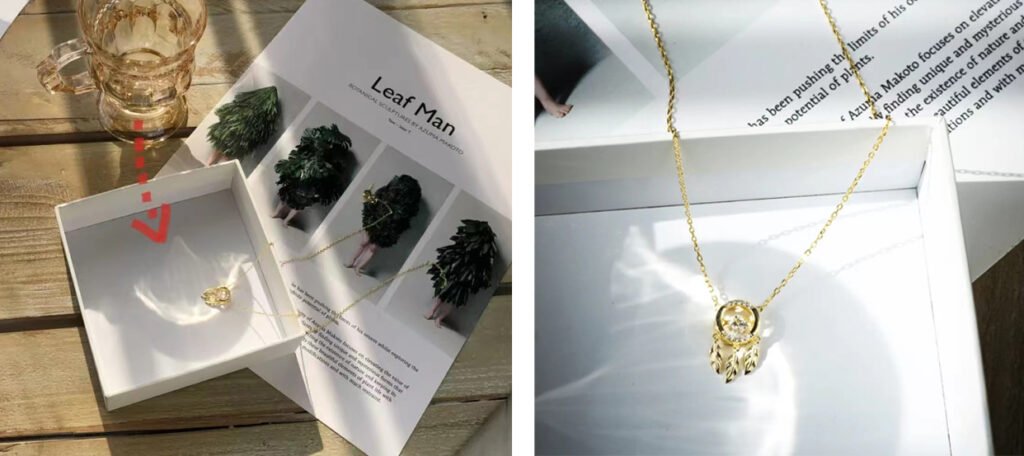
On the other hand, lighting also depends on the jewelry you want to use for photography. For example, things would be different for necklaces and rings. In addition, during photo shoots, many people consider using natural light.(Check out more more layout guides)
However, controlling the natural light isn’t in anyone’s control. Therefore, setting up an angle where the light would be perfect can be very challenging.
2. Choose A Suitable Background
Many people get confused when choosing a background for jewelry. Of course, a basic colored sheet would be perfect but choosing the right color for the sheet is what you need to keep in mind. For example, if the jewelry is silver and shiny, it would be best to choose a white-colored background.

A dark color sheet can absorb colors and may not give the perfect colors you were looking for. However, dark color sheets also look elegant and divert all the focus towards the jewelry.
3. Selecting The Equipment
Yes, the camera is one of the most vital components of the equipment. However, the next one is the lens. It plays a critical part when you have to photograph something very close.
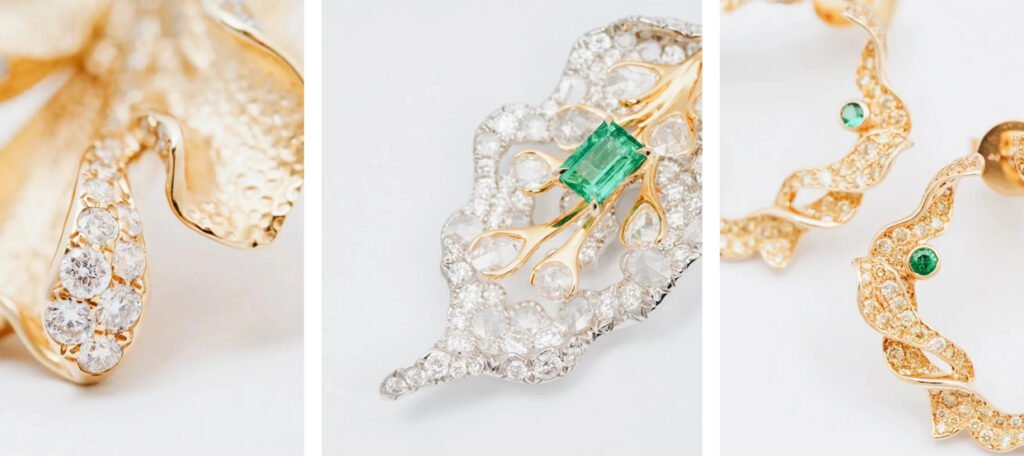
The best lens to work with is a macro lens. Whenever you are up for jewelry photography, always keep a macro lens with you. A macro lens helps you get the life-size magnification of the jewelry.
4. Additional Accessories and Props
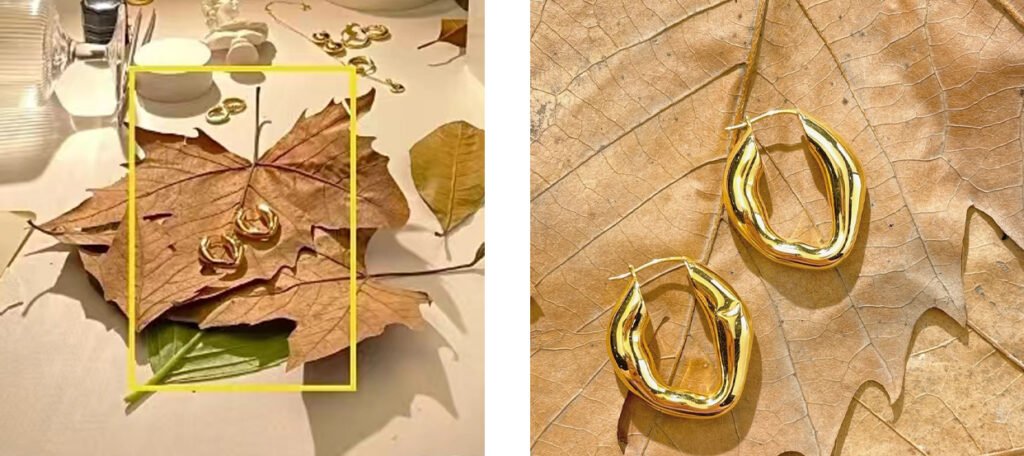
These include common natural props if you want to take floating-style jewelry shots. On the other hand, a mannequin bust would also be helpful for your photography.
All these points mentioned are factors you must keep in mind and gather before the photography. However, the main process is still there and requires a lot from you. If you are looking for perfect photographs of jewelry for promotional or other purposes, you need to give it your all.
Tips For Jewelry Photography
This is the most interesting section as it will help the most. Understand each tip we are going to talk about. We want you to take some of the best jewelry photographs and rock your ads.
Therefore, every factor we will discuss here shouldn’t be avoided at any cost. Photographing shiny and reflective products can be tricky. Make sure to follow each tip.
1. Always Have The Micro Lens
The combination of a quality camera and a macro lens is just phenomenal. If using the macro lens properly, you will get yourself some magazine-quality photographs.
We understand that getting a macro lens is expensive and sometimes over the budget. But it is the best one-time investment you will make if you pursue professional jewelry photography.
In addition, if you decide to get a macro lens, get the one with a 60mm focal length. It would provide you with the perfect magnification you want for jewelry photography.
2. Is It a Necklace Or Ring? The Answer Helps With The Lighting
You will photograph and set up the lighting when you know the jewelry. Yes, it is jewelry, but the lighting would be different for rings and necklaces.
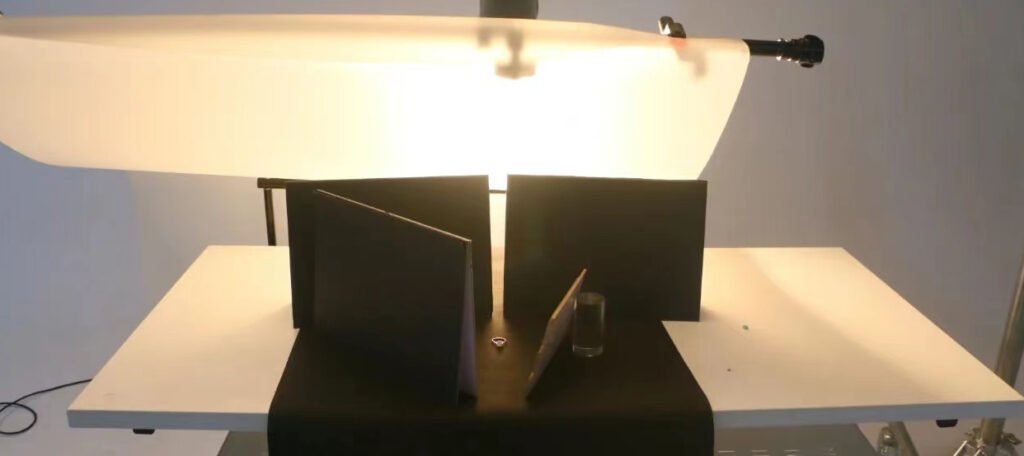
For both products, the best thing would be to place a sheet of white acrylic right in front of a bare bulb. This diffuses the light and creates soft lighting that looks perfect behind the product.
For a ring, things are tricky as the curved shape is very reflective. So all your efforts should be towards minimizing the reflection.
3. Perfect Way To Minimize Reflection
The best way to minimize and control reflection is by creating a conical light tent-shaped by a light color sheet. An acrylic sheet would work perfectly.
Leave the mouth of the conical shape for the camera, and you can place the lights outside the cone. This would provide gradient and smooth lighting over the jewelry.
On the other hand, you can also use reflector cards to minimize reflection. Place the reflector cards where you think the reflection is affecting the photo most.
4. Take Several Photographs With Different Points of Focus
You are wrong if you think you had a perfect photograph of the jewelry in a single shot. The best would be taking various photographs but with a different point of focus.
We said this because, after the shoot, you can merge these entire photographs if you have a good editor. This would provide you with a perfect magazine-quality, professional jewelry photograph.

This method is called focus stalking as it helps get a full focus photograph. However, if you are using this tip, here are some things you should keep in mind:
- Always have the camera locked
- Gradually shift the focus from one side of the jewelry to another
- Use all these shots in the post-shoot editing session
5. Perfect Photography and Perfect Editing
Yes, jewelry photography is one of the most challenging tasks. Many photographers spend a lot of time getting the results they are looking for. In addition, it can be very complicated to get perfect shots.
And if you do, it doesn’t stop there. After photography, it comes time for editing it. A perfect edit brings out the hidden colors. And if there is something that you want to highlight in the picture, you can.
Always use Photoshop for perfect edits. There you have unlimited options to choose and edit your jewelry photograph. A mistake many beginners make is that they don’t edit the photograph and just publish it in raw form. An edit is just a tool that helps you refine the colors.
6. Consistency is Key
This is an important tip that you have to keep in mind. But, again, consistency is the main key here. Be it your image size or the background, even minor changes during the same photography session can make the images look different.
Therefore, make sure to follow this tip every time for jewelry photography. If consistency is the main factor you are doing the photography for your online jewelry store, the
lighting can be different due to the angles, but the background should remain the same. This makes it eye-appealing and can help you understand consumer behavior.
7. Always Polish the Jewelry Before Photography
Make sure the jewelry is fully polished and clean before every photography session. As the photography is done closely and you need to highlight every single side of the jewelry, it is necessary to clean it. Any mark or tiny particles can ruin the picture quality as they are easily visible.
Also, if you have a piece of polished jewelry, you can show the customers what they are being offered. One downside of polished jewelry is that it reflects light a lot due to its shine. But don’t worry; above, we have mentioned how to minimize reflections.
8. Select an Aperture of f16 or f11
The biggest mistake many jewelry photographers make is that they think an aperture of f4 or f2.8 will provide them with brighter photos. Unfortunately, however, that is not the case.
Due to using the aperture of f2.8, more light enters the lens, which has a big disadvantage. Through this, the light gets brighter, but the focus isn’t much on the object.
The aperture of f16 and f11 are the recommended ones. This help highlight every detail of the jewelry as it is the most required when spending so much time on it.
9. Use Different Styles To Present The Jewelry
Don’t just keep the jewelry on a piece of sheet and take photos. This makes your every photo look the same and can get boring for people to look at. Therefore, try different styles to present the jewelry.
You can use a mannequin hand to present rings or cardboards hang necklaces. However, this is a creative section, depending on how you present the jewelry. But make sure it is a unique way to gather more audience towards your picture.
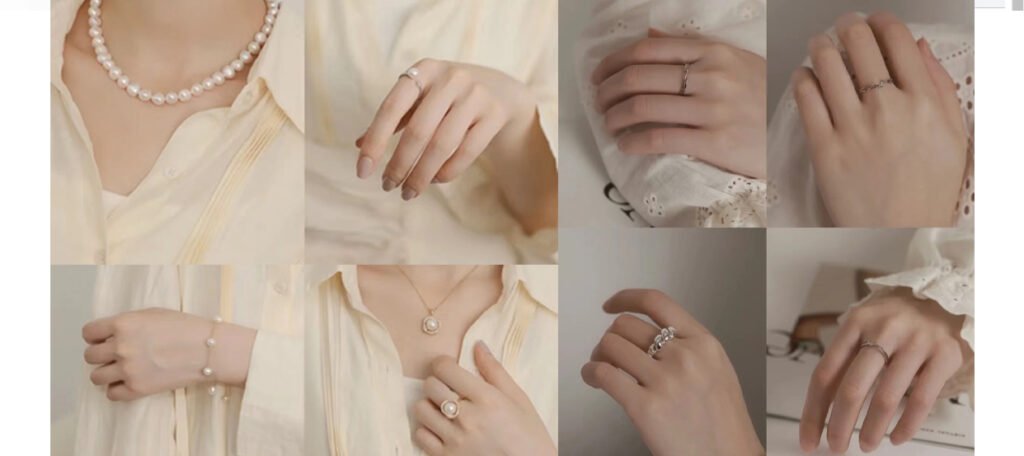
What if your photo gets famous due to the unique style the product is presented? The sky is the limit, and nothing should limit your creativity.
10. Use A Tripod To Avoid Camera Shake
Be it from any angle, always use a tripod to provide a consistent picture with zero camera shake. However, use a professional photography tripod as it can bend into different angles.
One of the best professional tripods on our list is the Manfrotto Super Salon 280 Camera Stand. It is an incredible piece and helps you perfectly with jewelry photography.
11. Use a Picolite with Projection Attachment
If you are looking to bring some more shine to the jewelry through lighting, this is the perfect option. A picolite with projection attachment is a remarkable choice. However, make sure to only use it as your second light.
The first light is covered with acrylic sheets will provide smooth lighting. At the same time, a picolite will add some shimmer to your jewelry. Do use this tip, and you will see the difference for yourself.
12. Always Retouch Photos
After you are done with photography, look closely at every photograph. Make sure there are no irregularities anywhere in the photograph. For a professional photograph, it should be as clean as a whistle.
13. Always Wear Latex Gloves When Handling Jewelry During Photography
One mistake many photographers make during photo shoots is touching the jewelry without wearing gloves. After the jewelry is polished for the shoot, it gets vulnerable to fingerprints and dust particles.
Therefore, handling it without gloves can leave behind fingerprints and other marks. And then, using a macro lens can make those prints look clear in the photographs.
Most photographers edit the fingerprints and marks by ng Photoshop, but the quality may get affected. Therefore, it would be advisable to take precautions beforehand.
14. Keep Experimenting With Many Things
It is great to experiment using different things. For example, using new things during jewelry photography would be amazing. For example, you can try different lighting and angles to see which would suit the best.
On the other hand, use various props and make your photos look attractive. However, the main focus of your photographs should be jewelry. Therefore, these props should be a part of your background.
15. Work Smart
When pursuing product photography, many beginners spend a lot of money on expensive equipment, thinking it will only help them get the best photos. However, that is not only the case.
As we said, photography is not a skill but an art. It requires you to be creative and smart. Many people use extension tubes rather than an expensive macro lens. And guess what, the results are sometimes mind-blowing.
Therefore, you must work smart and make the best out of everything.
Final Words
Here is a complete guide for the best tips you must remember during jewelry photography. Every tip will help you work better and bring out the best results you were waiting for. So make sure to give it your best to achieve the expected results.
