Product photography is a huge market now since the popularity of social media marketing and e-commerce. Even if a brand is not marketing its product online, it still needs some remarkable pictures to post on its site. It attracts customers and showcases the product that they might be getting.
Out of all the products, apparel or clothing photography is a bit tricky. You can hire a team of professional product photographers, but that would burden the cost. No brand would want to increase its cost by such a scale.
These are some of the factors you need to look at before starting with the photography session.
- Lightning
- Equipment
- Background
- Photoshop Expert
- And many more
And if you just started a clothing company, then it would be best to carry out the photography yourself. Therefore, here is a complete clothing ghost mannequin photography tips guide to help you out.
There goes a lot for ghost mannequin photography, so it would be best to read and understand every section thoroughly.
Pre-Shoot Clothing Ghost Mannequin Tips
The biggest take you would face is getting everything right before the photo shoot. Many beginners think it is as easy as a picture of a sunset, but it is nowhere near it.
Everything needs to be set right in place to ensure you are ready. Ensure that the things mentioned below are arranged and ready before starting the photography session.
That is undoubtedly the most important thing you need for a clothing shoot. Without a ghost mannequin, you won’t have any way to display your products perfectly.
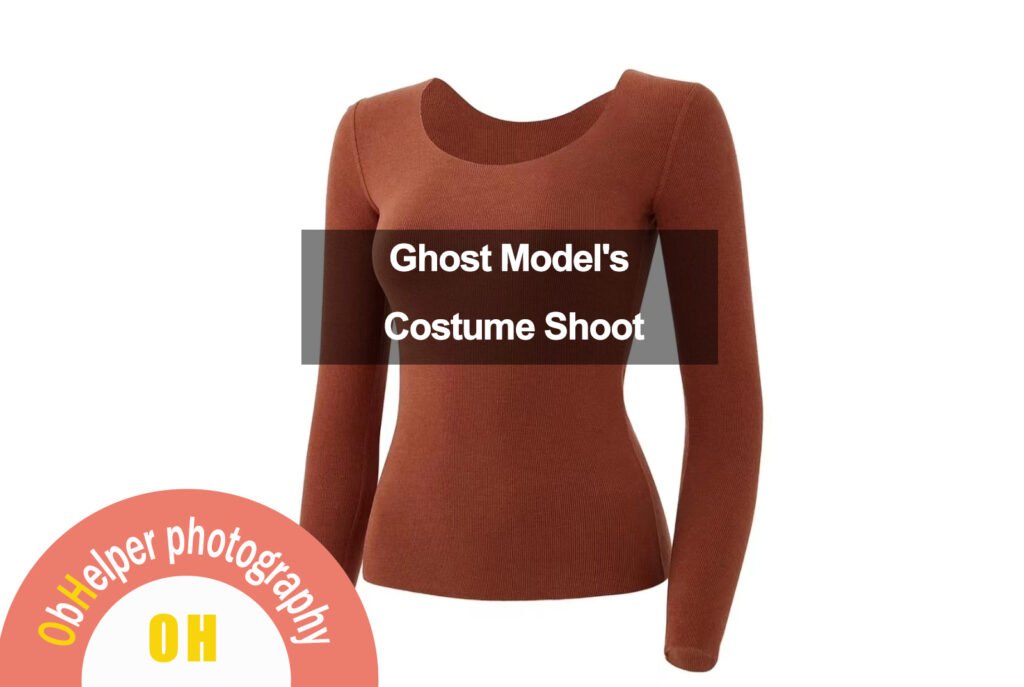
There is a slight difference between a normal mannequin and a ghost mannequin. The upper body is required for a ghost mannequin without the head and hands. This is what makes the product look like a ghost is wearing it.
We understand that a mannequin is important, but more than that, the size also matters a lot. You don’t want to get a skinny or oversized clothes mannequin. That would make your photographs look very odd and give the audience a good impression.
For men’s clothing, a mid-size mannequin with a bit built would work perfectly. On the other hand, for women, you can go for a skinny mannequin. You need to understand a lot about your consumer behavior before setting things right.
2. Background
The mistake many new clothing brands make is choosing a green screen as a background for their clothing photography. That is the worst choice of background you can go for. Setting an image or background on the green screen removes your products’ essence.
The focus of the customer goes more towards the background. It would be best to go for a plain sheet background for clothing. It is recommended to go for a light-colored background sheet.
Then with a lighting play, you can get the perfect clothing ghost mannequin photographs.
3. Lighting and Camera
Get as many lights as you can. Be it a stand light, umbrella lights, or flashes. You won’t get to use all of them but having them in a backup would be a wise choice. Understanding the lighting position is very vital.
If you know how to make things work with the lights, the right position and a single light can do wonders for you. Make sure to use consistent lighting throughout.
Clothing mannequin photography is very difficult as you need to take multiple photographs of a single product. Therefore, you need a specialized camera as well.
Some of the best photography cameras you will find on the market. First, get some great options and see which suits your requirements best. Then, invest in a camera that you can use for years, which can be a great investment.
Using lenses and other accessories will surely help you achieve your goal.
4. Tripod
Always attach your camera to a tripod for ghost mannequin photography. For ghost mannequin photography it is required to multiple photographs mainly from the same angle and distance.
If you are not using a tripod ensuring the same angle and distance would be impossible. In addition, the tripod will ensure no camera shaking and a stable photograph of your apparel.
There are some professional tripods available. Get a multi-function tripod that will help you in most of your projects. It would be a great one-time investment to make.

5. Photoshop Skilled Expert
An intermediate Photoshop expert would work fine if you were using a mannequin for normal photography. But ghost mannequin photography is one of your most difficult tasks. It requires a professional, experienced editor who has done ghost mannequin photography projects.

Make sure to choose the right expert; otherwise, you won’t get the expected results. For ghost mannequin photos, you need to have sharp 3D effects. It should look like no mannequin, and the product is floating in the air.
Tips For Ghost Mannequin Photography
This is where the real challenge begins for you. Here is the most interesting and important section of this guide. We want you to take some of the best ghost mannequin pictures out and rock your ads.
Therefore, make sure not to avoid any tip or factor discussed below. It will help you ensure the best results.
1. Ensure That Ghost Mannequin is Facing The Camera
Many photographers make a mistake by positioning the mannequin slightly sideways. This can affect the quality of the photographs. Since mannequin photography requires a lot of post-production editing, keeping the mannequin straight toward the camera would make your work easy.
Not only that, but it would display the apparel more appealingly. Every corner of the clothes would be displayed properly, and the audience could look better at your products.
2. Capture Photographs of Different Portions Of The Clothing
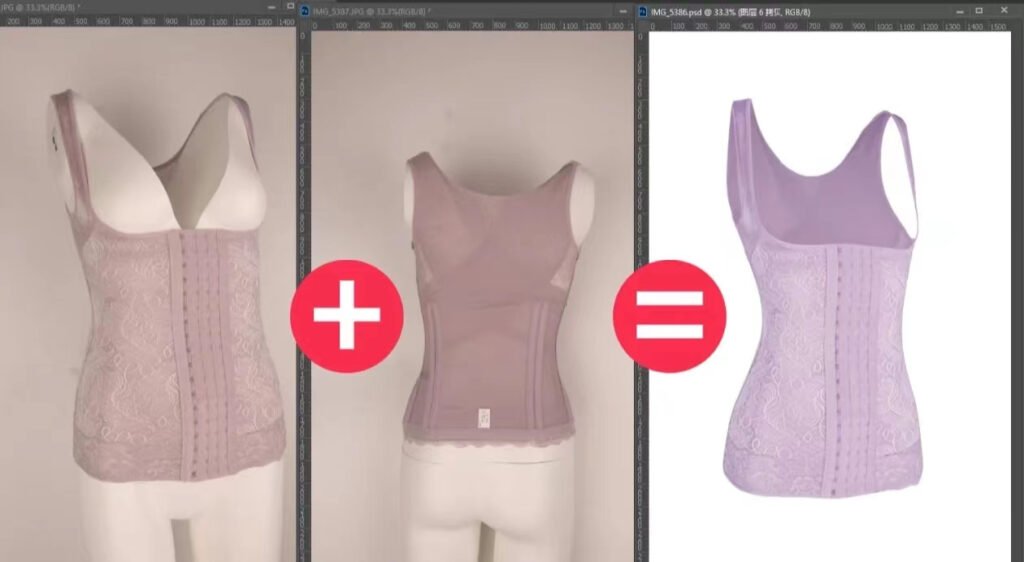
This is why ghost mannequin photography is the trickiest and most time-consuming. It doesn’t depend on a single photograph of the apparel. Instead, it would be best to take multiple photographs of different portions.
First, ensure you capture the entire piece of clothing on the mannequin. That would give you the base photograph you need during editing.
Then, take pictures of the sleeves, collars, and bottom half of the articles. However, make sure you clip those portions to a background sheet. Here are some points that you should keep in mind when doing this.
- There should be no overlapping.
- One piece of clothing should be visible
- Shoot in lay images
- The garment should be straight
If you miss any of these points, the result of your photo shoot will be highly affected.
3. Having A Ghost Mannequin Software Would Be Handy
Yes, other than Photoshop, which only helps you edit images, many types of software are available to help you with ghost mannequin photography. This software makes your work easier and helps you refine and improve the quality of your photos.
Ghost mannequin photography is now so popular and in demand that many professionals also use such software. Make sure to look at multiple options and choose the best one.
4. Balance, Symmetry, and Fit: Three Most Important Elements
Putting clothes on a mannequin sounds like an easy task. But if you are looking for high-quality photographs, you must take care of every single element involved.
The clothes should look symmetrical and well-balanced. When you put the clothes on the mannequin, it is time to have a very close at every part of your clothes. Be it a shirt or a blazer, the shoulders must be even, neat, and aligned properly.
On the other hand, if you are doing a photo shoot of a trouser or jeans, things will be a bit different. First, you must ensure that the clothes fit the mannequin’s legs.
If the fitting is not good, wrinkles will appear, which is the last thing you need.
5. Styling Pins and Clips Would Be Great Help
Ensuring the clothes are properly fitted on the mannequin, styling pins, and clips would be perfect. Most stylists use small-size clothes to fit a medium size mannequin, but that stretches the fabric and is a big mistake.
To avoid that, it would be best if you used the pins. You can place them vertically inside clothes for a better fit. Remember that the pins and clips should be invisible; even a glimpse of them can ruin the results.
Tips For Ghost Mannequin Effects By Using Photoshop
We understand outsourcing the post-production work to a team can be costly. However, it saves time and all the frustration you have to go through editing a picture and adding the ghost mannequin effect.
But if you want to save costs and have Photoshop experience, these tips will help you add the ghost mannequin effect yourself. Therefore, keep reading to know more about the ghost mannequin effect. These are not the steps but a few tips to help you in your Photoshop session.
1. Use Layers In Photoshop
This is one of the easiest ways to edit and create the perfect ghost mannequin image you want. First, open the main photo with the entire outfit in Photoshop and then create layers.
Then, open all the other close pictures you took of every portion. Make sure to use the main picture as your base photo on the foam board.
2. Use the Selection Tool
A selection tool will help you highlight the apparel in the mannequin photograph. That makes things a lot easier when you have the apparel highlighted and use it in any way you like.
Use one of the blank layers you created to move the selected apparel. However, before zooming in, use the selection tool and carefully select the product. Make sure there is no single corner of the mannequin in it.
This would give you a good ghost mannequin photograph. But this selected image may be a bit raw and unclear. But don’t worry, you have the best software already there. Photoshop is the only software you need if you don’t want to invest in any other software.
3. Refine and Mask Your Photograph
Now that you have selected the product photograph, there isn’t much work. All it will require is just some final touches to refine and enhance the quality of your photograph.
Refining your picture will ensure that the photograph is sharp and neat. In addition, it will help eliminate the unnecessary background and mannequin glimpses. By this, you will have an amazing floating image of your product on your screen.
4. Combining Foam Board Images
If you created foam board images, then make sure to combine them after you’ve masked the first image. This would help you get a highly enhanced and clean photograph.
Make sure that the foam board image sits perfectly on the original picture. If it isn’t aligned properly, the result will be affected. Make sure each layer sits perfectly behind the other.
5. Add Shadows
Shadows will help you add the same depth to all the images. This will ensure consistent depth and colors in the images. Finally, save the layers file and merge them.
This will give you the image that you’ve spent all this time and effort for. This is the final step that you might take. If you considered saving the image without shadows, you would be making a mistake.
Try adding shadows, and you will find the difference by yourself. However, it is your product, and you know the best how to make it look great.
Final Words
Here is a complete guide for ghost mannequin tips. One of the most difficult editing effects one can add to an image. We understand it is time-consuming but worth every effort.
We provided you with some of the best tips that will help you throughout every stage of ghost mannequin photography. So get some of your best apparel and start the photo shoot.
These tips will come in handy and teach you a great deal. Don’t forget to share these with your friends if you are facing issues with ghost mannequin photography.

