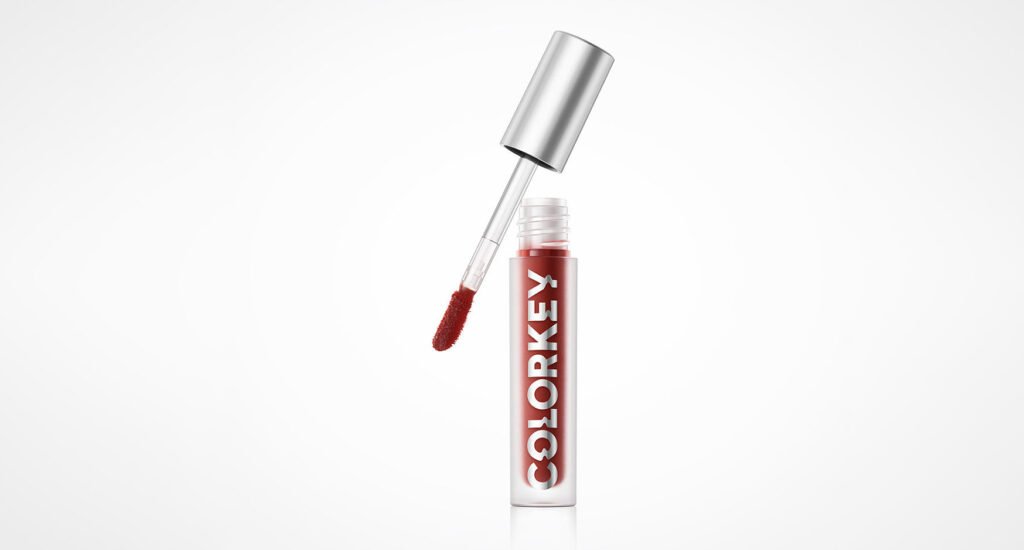
The angle of the product picture can make or break the decision of a potential customer to buy. That is because an angle should fully showcase your product while conveying brand personality. Of course, learning the right angles is a process of trial and error in product photography.
You can choose from various angles, such as the 45-degree angle, front angle, back angle, side angle, top shot, and many others. There are endless types of angles you can select. Once you do, you can take product photography to another level.
So, if you are looking for the best angles for your product shoot, you are in the right place. Here is a complete guide to the best angles to help you take excellent shots.
The Best Angles For Your Product Photography
Here are the best angles you can incorporate into your product photography:
1. The 45-Degree Angle
The 45-degree angle shot will help you showcase two different sides of your product. That is because it shifts the product’s position to 45 degrees so that you can have such a view. It is important to use this angle if your product has details on the front and the side.

These details are crucial to capture in one frame so that your customers can visualize what your product will look like. Some of the top products that can benefit from this angle include cars, footwear, and many others. You can experiment with this angle with your products and see if it suits you best.
An important reminder while taking such a shot is that your product shot does not need to be at an angle of 45 degrees exactly. Instead, you can experiment with the angle until you find a shot that captures all the details you need. You can also take note of this angle if you want to try taking pictures of other products using the same angle.
2. The Front Angle
Of course, the front angle is one of the most commonly used angles for any product shot. On many platforms, marketplaces, and e-commerce websites, it is the first image you see of the product. The idea behind this angle and tactic is to help consumers become familiar with the product, as it mimics what you will see when you enter the physical store.

Because of this, it invokes a feeling of confidence and familiarity that will enable the potential customer to trust the brand. Besides that, the front angle will also flawlessly showcase all the important features of your product that the customer must know about. They might even get the information they need from this picture without having to go through the product description.
We recommend that you take the front-angle shot with a white background. It is the easiest shot to take, and the white background will ensure that all the focus is on your product. Once you do, it can be the first shot of your product images that will give the consumer an idea of your product.
3. The Back Angle
Do you have products that have information on the back? These include ingredients, labels, nutrition, and other product information that the consumer will go through in the physical store when buying the product. If you do, then the back angle is one of the most important angles that you can’t miss during the product shoot.

Besides that, it is also an important angle for a product that has a design on the back. For example, if you are selling t-shirts, and they have a design on the back, then you must take a shot from the back. As a general rule of thumb, most e-commerce retailers use the back angle shot as the last picture.
That is because the back details are not as important as the product’s other features that you must understand before. Another reason is that important information about a product can overwhelm the user. That is why e-commerce retailers use them last so that the customer does not feel too overwhelmed.
4. The Side Angle
The side angle is also known as the profile angle, and it is ideal for any product that includes lots of details, especially on the side. For example, if you are selling sneakers, and there is a design on the sides, you must take a side shot. It will offer a clear picture of the product and the design, which will help customers decide.

Most e-commerce retailers will use the side angle as the second image in their gallery. That is because it captures the essence of the item, and you will get to see more details than the front shot. There is no limit to the type of product whose side angle shot you can take.
It is ideal for any product, which is why you must include it in your product photography. Once you do, your customers will have a clear picture of what to expect from your products.
5. The Top Angle
The top angle is perhaps something that e-commerce retailers use the least for their product photography. That is because it is usually ideal for showcasing a few different items that are present in one picture. For example, if you are selling a hair straightening kit, then you can take a top shot displaying the main product and the accessories.

When you take pictures in this way, you can present all products fully. If you use another angle for many products, they will obscure one another, and it can leave the customers feeling confused. That is why we recommend that if you are selling something in a kit or bundle, then you must opt for the top angle.
The top angle is perhaps the most difficult one to master because it can tend to look flat if you don’t use the right details. So, it is important to set a plan for how you would want your top angle shot to look for the best results.
6. Macro Shot
Finally, the macro shot is also one of the most important shots you can take. Such a shot is taken to highlight all the details present in your product. For example, e-commerce retailers that sell jewelry use the macro shot the most.

That is because there is a macro setting in professional cameras that focuses on all the important details of your product. Even apart from jewelry, if you have a product that includes a unique feature, then you can use the macro shot to show off that feature. These are one of the most popular shots to show the customers exact details of what they are purchasing.
Such shots build confidence in the customer that they will get what they are looking at. If you have a product with a specific feature or an intricate design, then you can opt for the macro shot. You can zoom in and get this shot to take your e-commerce product photography to another level.
What Angles Should You Use For Product Photography?
By now, you might be wondering about the angles that will be perfect for the products you are shooting. The simple answer is that you should use the angles you think work best in selling your products. That is because each product photo you take will cost you time and money.
So, if a shot is not helping you make sales, then it is best not to opt for it to save your time and money. Besides that, if you have shots that don’t show anything useful about your product, then they are useless. That is because customers need to see useful things so that they can decide whether they want to purchase your product or not.
You need to get into the mind of your consumer and understand the different angles that they would like to see for the products. If there is branding or an important detail on your product, then you must take the shot. So, work with different angles and see which are the most useful and help you to sell your products.
How Many Angles Should I Use For Product Photography?
The number of angles you use for a certain product depends on your product. However, we recommend that you use as many angles as you possibly can so that you have enough material to select pictures from. During this process, we recommend that you avoid using the wrong angles, as that will just waste your time.
You should focus on using angles that make your product look interesting so that the consumer is compelled to buy. Besides that, the angles should offer useful information about the product. In the long run, such shots help build credibility and trust, which means customers will stay loyal.
Of course, this is a process of trial and error, as you will have to see what works best for your products. Once you pass this stage, you will become an expert in taking shots of your products with all the perfect angles.
What Should I Incorporate To Do The Best Product Photography?
While angles are important to understand, you must still incorporate other elements that will help you create a perfect product picture. Here are some of the tips you can utilize with all the angles to get that perfect shot:
1. Make Use Of Negative Space
One of the most important things you can do in picture composition is to make use of negative space. For example, you must photograph the product from the angle you like and leave the rest of the space blank. Utilizing such negative space will focus on the product and ensure that the viewer’s focus remains on the product.
We recommend that you don’t use any elements that will distract the viewer, especially in the front-angle shot. It will guarantee that you can focus on the product and offer useful information.
2. Use Props
Of course, when you are taking pictures from angles, such as the top shot, it is important that you use props. It will add some depth to the photographs and guarantee that your products don’t look flat. We recommend creating a style and prop guide around a theme that best suits your product.

For example, if you are shooting a bread with ketchup and taking the top shot, you can use tomatoes as props. These will add a pop of color to the shot and will help the user to understand the product ingredients even better. In the same way, you can utilize props smartly to get the most out of your top product shots in no time.
3. Experiment With Your Creativity
There is no limit to the amount of experimentation you can do with angles. For example, you can take product shots through framed glasses, inside the water, and much more. The key is to get creative so that you can create unique images that will catch the eye of the potential customer.

You can take ideas from your competitors and see what they are doing for their product shots. Doing such research will help you understand the creative techniques that might work for you. However, don’t copy the pictures they are doing, but take some inspiration to fuel your creativity.
People love something unique, so you must not be afraid to think out of the box. Once you do, you will see some of the best product shots that will change how your customers view you.
Final Words
That was your complete guide to all the different angles you can experiment with for your product photography. As they say, an image speaks a thousand words, so it is crucial to get the perfect shots for your products. As you do, customers will stay on your website and take action to purchase your products.
Good product photography can also make all the difference to the look and aesthetic of your website. So, work with these angles and upload the best product shots.

